About Me

My photo
I love reading education blogs, fashion blogs, craft blogs and dreaming!

Check Out My Store

Pre-K, Kindergarten, First, Second, Third, Fourth, Fifth, Sixth - TeachersPayTeachers.com

Monday, August 26, 2013

Classroom Reveal!

Here are pictures from my classroom! I have a lot of pictures to share so I will try to keep the post brief and give you time to look at how everything came together.  After spending time decorating one classroom for kindergarteners, I was moved to a different room to teach second grade! So even though I have been back in the classroom since the beginning of August, I spent most of that time preparing for kindergarten and was rushing up until the last minute to get ready for a new room/position! :)  

So, this classroom is a work in progress!
This is the view from the door as you walk in to the classroom.

This is the view towards the front of the room.

My listening center is an ikea laundry shelf. I love that it comes with hooks that hold my headphones perfectly! I made the crate seats this summer and my former teammate and current friend made the curtains.

This is our time-out or cool down area.  Our school follows a positive discipline approach to classroom management.  I have emotion cards printed out on the wall as well as a bug and wish poster that I made.  Students can sit on the exercise ball if they need a break.

This is our learning target board "owl-ways learning." I will post our learning targets there daily along with the proof or how they will know when they've met the target.  The left side of the board has class rules and will have birthday photos.  The right side of the board will hold our class data. 
This is my guided reading and calendar area.  The pocket chart is hanging on an ikea laundry rack.

This is my teaching corner from the carpet. With my easel and a class conversation board. It holds our "talk-moves" posters and will also hold our good listeners/ active participants anchor charts

This is the view from the front of the room looking towards the back.  You can see my tech cart and notice my pencil sharpener! I rarely win things so I just went ahead and bought one, it was worth it!

This is our library corner.  The tall shelves hold leveled books that students will put in their book boxes.  The picture books are in rain gutters so that they face forward.

A close up of the rain gutters.  My first year teaching, I contacted a gutter company and asked if they had any scraps or leftovers.  They not only agreed to give these to me for free but they also delivered them to my school! I mounted them to plywood covered in fabric so that I could move them around.  I have loved them! 

My students have their cubbies inside of these.   What you see is my word wall.

My hall passes and where are you going student board (available on Tpt).

We are still getting the bus situation sorted out but these will eventually have clips on them with students names/ bus numbers.

I just love these table numbers! The owls are from Carson Dellosa, I made the poofs and bought the fans from Party City.

This will be the writing center, it is still in the works!


This houses all of our supplies.  I turn around the students' desks because I can't stand the mess, so we share everything!

A close up of my class conversation board.  You can purchase the posters from my TPT store

I actually organized all my math manipulatives this year.  I even created my own labels and labeled everything!
I hope you enjoyed my classroom tour!

Saturday, August 17, 2013

Classroom Discussion

One of my goals for this school year is to improve my classroom discussions.  How many times have you planned out a great topic for discussion only for it to fall flat?  Or had only one or two students able to participate in the conversation?  I have found that explicitly teaching the students how to engage in discussion lays an important foundation for later classroom success.  So, how do you teach students that may not be comfortable speaking in class, to speak in class?  You start with some simple "talk-moves."  The first one that I plan on teaching the class is called repeating. This is especially important if you have ELL students or kiddos that are uncomfortable talking out in class.  Repeating is simply asking one student to repeat or rephrase what another student has said.  This really shouldn't be used as a "gotcha" classroom management tool.  Your goal as the teacher is not to "catch" the student that wasn't paying attention but rather to highlight and amplify the student who "hits the nail on the head."  You don't have to ask students to repeat everything that is said- they aren't parrots.  When a student makes a great point you just ask one or two or three other students to repeat or rephrase what they have said.  You then check back in with the original student to make sure that you are retaining the intent of their statement.

There are six other "talk-moves" that I will be trying out this year; revoicing, reasoning, adding on, waiting, turn and talk, and explain and revise.  These are all adapted by my school from the book Classroom Discussions; Using Math Talk to Help Students Learn.  As I learn more and practice I hope to post about them here and we can all learn together!  In the meantime, check out my student friendly posters on TpT for classroom discussion.  You can print them out and hang them around your carpet area to help key you and your kiddos in to increasing discussion, engagement and achievement!
Check them out here


Monday, August 12, 2013

Let's Talk About Me Monday


It's teacher week! Wohoo! Monday is all about ME!

1.  I have two precious pups named Walter and Emmett.  Emmett is the older and wiser guy, he is 5 years old and we have had him for 4 years.  Walter is probably 2 years old and we just got him at May.  The local Humane Society has a mobile adoption center that was at the opening day of our farmer's market.  After texting my husband a picture of Walter and dragging him there to meet him, we knew that we couldn't leave without him.  Walter fits in with the family perfectly!
Meet Emmett and Walter!
2. I started running recently with the Couch25K app.  After completing a few 5k races, I have upgraded to the 10k program.  I don't LOVE running but I love how I feel after I finish.  I am lucky that I live in a great neighborhood where we have fun running together.

3. My husband is a HUGE Seattle Sounders fan.  He loves all things football (soccer) and loves living in a city that celebrates it as much as he does.  He has turned me into quite a fan too- we don't have season tickets but we try to go to as many games as we can.  I have so much fun in the packed stadium singing along with everyone! :)

4.  My husband is in graduate school studying Museology.  He gets to play with fun artifacts and study in museums! I am really proud of him!
Here he is leading a discussion at the local community college
5.  We are thinking of trying to buy a house but that means we would have to commit to a city!  Both my husband and I are wanderers so although we want to own instead of rent for the rest of our lives, deciding what city we are going to live in is a big challenge!

6.  I spend a ton of time watching the Real Housewives.  I love the women of New Jersey.  I can't wait to find out what is going to happen with Theresa!

7.  I have been a pinterest fanatic for a while now.  You can follow me here!  Most recently I have been learning how to wear make-up.  I have always worn make-up but I just kind of slapped it on my face, not really knowing how to do anything with it.  This weekend I practiced using bronzer and highlighter to contour my face.  Not sure if it actually works or not- but it is fun.  
New haircut and a lot of make-up to look like a little

8.  I am crazy organized at school but once I get home I am so tired I have a hard time staying on top of everything! My house looks completely different in the summer because I have time to get organized!  My friends know that in the summer they can drop by anytime but once school starts- they either need to call or be prepared to stand around while I shove everything into the bedroom!

9.  I love shopping but never buy anything.  I need to have people with me to convince me to buy things, otherwise I wont do it.  Even things I need.  It is strange.

10. I blog stalk- a lot! I hope to do more posting myself and leaving more comments so that I am not a stranger! :)

So that's my 10 things- now go and write yours! Be sure to link up at Blog Hoppin' and be ready for the rest of the fun things for teacher week!


Wednesday, August 7, 2013

A sneak peek

I hear that some of you are back to school already! I wont have kiddos for a couple more weeks but I have already been in setting up my classroom.  I must say, I think it looks pretty good!  I wanted to post a few pictures but I am not ready for a big classroom reveal post yet- in fact, by the time I post a reveal, my classroom might look very different!


Views from two of the corners in my classroom.  Check back to see what changes are coming!

Monday, July 29, 2013

Revamping an Old Favorite

Last year I jumped on the crate seat train and I just LOVED them- and even more importantly, the kids loved them.  We used them last year to keep our book bags out of the way and students really loved sitting on them to read. You can see a picture of them- unfinished- here.

Well, here are the pros and cons of my crate seats after one year of use:

Pros:

  • Extra storage
  • Extra seating
  • Students loved them
  • I used vinyl table cloth to cover the top-easy cleaning
Cons:
  • I forgot to add a pull tab or some way for the students to lift up the seat without just grabbing the fabric.  Since I didn't add that, I had a lot of rips and tears in the cover.
  • I used quilting batting that I had in my house and it wasn't very comfortable
So, I decided to revamp them for a new year!
These were the old tops- and my dog Emmett who wouldn't stop photo-bombing!

Here you can see some the tears in the fabric :(
I added some pre-cut foam from Hobby Lobby to the cushions.  They were $2 per piece and I made 4 seat crates.

Then, I cut my fabric and laid it out-

I realized that my staple gun was out of staples and I didn't know how to load it. After calling all my neighbors (they were at work), attempting to call my husband (he was on a work trip in Poland) and 20 minutes of googling- I figured it out!

Ta-daa! Seat crate (sorry about the bad lighting)! Notice the pull tab sticking up?

Another angle, and another photo bomb from the pup!

For the fabric I used an old shower curtain from Target.  I am a bit nervous because it is light colored but I already had it on hand and I love to reuse instead of buying something new.

That is it for my Monday Made It contribution.  I have been in my new classroom all day getting set up and things are starting to come together.  Head on over to 4th Grade Frolics to check out all the other fabulousness going on! :)


Monday, July 22, 2013

Back to School Student Gift


I have just under a month left until I am back with the kiddos! I know some of you start back to school much sooner than me...I am not jealous of you! :)  I have a bit of time before I need to worry about the back to school bbq- but I had this container of broken and peeled crayons just sitting around so I decided to make this...taa-daa!


Each kiddo gets one of those very cool melty-crayon-things (I am pretty sure that's the technical term)! They were super easy to make- just take your crayons, peel the wrapper, break them up and stick them in a greased mini-muffin tin and melt them in the oven for 15 minutes at 275F.  At first, I tried coordinating the colors but then I just went for the tie-dye effect!

I made the cute label to incorporate both owls, my classroom theme, and the colorful crayons.  You can download a copy of it yourself here.

Thank you to The Hazel Owl for the circle badge and My Cute Graphics for the owl clip art.  The font is my own. As always, be sure to link up with 4th Grade Frolics

Monday, July 15, 2013

Laminating Crazy!!

I decided to purchase a laminator from Amazon.  I am so glad that I made this decision! I got the Scotch Thermal Laminator 2 roller system.

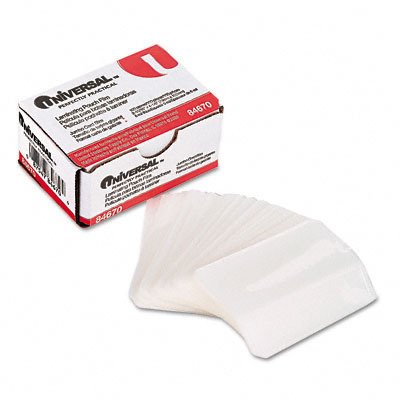
I have been a laminating fool since I got this bad boy! It can laminate anything up to standard paper size.  I also went with the Universal Laminating Pouches instead of paying the extra money for the Scotch brand pouches.  I got business card size, 4x6 and letter size.  You can buy a box of 100 for $8.26

I have been enjoying some FREEBIES from TpT to use on the laminator and I can't wait to put them up in my classroom.  

First, I laminated these free alphabet cards from The Inspired Apple. I plan to use the upper/lower case cards on my word wall.

Then I laminated these direction/supply cards from Bainbridge Class.  I will use some to label my supply containers and then some to include picture directions.

Today I laminated alphabet posters from Kindergarten Smiles. I can't find the freebie that I was able to download of just the alphabet posters but you can purchase the alphabet posters and matching word wall cards- super cute!

So- I didn't really make anything today- but I did spend a lot of quality time with my laminator.  I think we are going to be great friends!


Monday, July 8, 2013

Monday Made It- Where are you going? Board

I am joining up with 4th Grade Frolics for her Monday Made it linky.  I can't believe I have never linked up before- but I am a slow crafter.  I can't have too many projects going because it drives my husband crazy (I never finish them)!

Have you seen these boards on pinterest? It is from Second Grade Style  I have seen some other boards like this on pinterest but I can only find this example right now.

I wish that I had made this last year with my second graders.  It would have been so helpful to keep track of the many places they went!  I want to try this with my kinders for this year.  I think it may be difficult in the beginning but I have some ideas to make it more "kinder-friendly."

First, I used these wooden circles I bought at hobby lobby as the base of the magnet.  I wanted to spray paint them purple.  I didn't realize how difficult spray painting something could be when you live in an apartment! It was way too windy to spray paint them on the sidewalk (my original plan) so I built a plastic bag cave and spray painted them in my kitchen! Thank goodness I didn't get any spray paint on the sink or counters :) The force of the spray paint blew the wooden circles around but I only needed one coat on each side.

Ta-daa! The materials are laid out and ready to go- cookie sheet, spray painted circles, and adhesive magnets.
These magnets were so easy to stick on! I hope they last the year.
I painted a number on each of the magnets using a paint pen.  I wish I would have used white paint- it would have stood out more on the dark purple.  I am also not sure that kinders will grasp on to the whole numbering concept.  It will take a lot of teaching because most of my supplies are numbered.  I am thinking of putting their picture over the numbers initially to help them use the board and then as they get more comfortable with the numbers removing their pictures.

I used small duct tape to divide the board- it is a little crooked, I may have to fix that!

And here is where the project sits for now- not done! The where are you going label will go above the magnetic board.  I am going to glue the number chart to the board so that students know where their magnet's "home" is located.  The labels will also be glued to the board.  In the examples I saw on pinterest most of the sections were only labeled and I know that kinders would struggle with putting their magnet in the right spot and then what would be the point of this whole thing! LOL. I made the labels with clip art so that they can hopefully put their number in the right spot when they leave the room.  Once my new laminator comes in the mail I am going to laminate all of this and finish it up! I can't wait!

The labels are forms that I used for this are uploaded to my TpT store and available for FREE. If you would like to download them click here

You might want to make a magnetic board like me or you could just print off the labels and put them in name tag protectors for hall passes.  Use them as you wish! Enjoy!